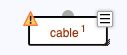
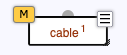
You create new diagram nodes by dragging them from the templates at the top of the screen. Each node is visually represented as a shape with its name inside or below, and up to five decorations that will become visible when you approach the node with the mouse.. Clockwise, starting from the top left corner:
Move the node to another location on the workspace by dragging it around.
There are two ways to move more than one node at the same time. Hold the shift key while dragging a node to move all nodes in the diagram. Alternatively, create a selection, and drag the selection rectangle to move the selected nodes only.
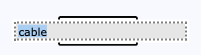
Rename a node by clicking its title. Note that the area becomes blue when you hover the pointer over the title. Confirm by clicking somewhere outside the workspace, or press Enter. Cancel the action (that is, revert to the current title) by pressing Escape.